Finally, It Worked
So after a multitude of issues, the Pertronix worked. Here is something to note the primary video I used is this one. SVDA Pertronix Distributor Install since it was the exact distributor that I have. I used a Pertronix Flamethrower distributor, new cap and rotor, and a new Pertronix 40,000 volt coil. I also used new Spark plug wires and made sure that the positive and negative terminals were correct.
I really only had one question prior to installing.
1. Do I just pop the old one out and install the new one?
ANSWER: Yes, but make sure you are set to TDC when you pull the old one out.
After watching the video is was pretty straight forward. BUT here are some things that they don't tell you .
TIP ONE: at 2:22 in the video he just pops off the distributor cap and lets it hang. Assuming that he plans to use the same old cap. I want to use my new one so if you do please take it off then swap your wires to your new cap. SEE tip FIVE because this is where the video shows that the cap rotated, BUT with my new one it was different.
TIP TWO: Use some grease/OIL/Moly to lube the small rubber gasket on the New Distributor shaft.
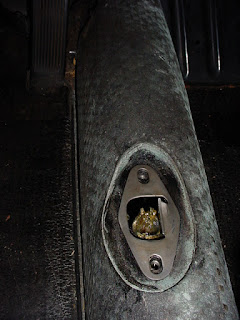
TIP THREE: Look inside the distributor HOLE and then line up the slot at the bottom with the two protruding notches on the bottom of the distributor. It makes an easier time sliding the Distributor in.
TIP FOUR: at 3:35 it talks about the Rotor being nice and tight. What I found is that in order to ensure the slots at the bottom have lined up correctly rotate the rotor until the little slots pop into place, you can feel it happen. ALSO when moving the rotor it is tight and only moves a little back and forth, IF it moves too much or is very loose and rotates a lot it is not all the way in and needs to be moved or rotated more to make it slide in further. EVEN a small 1/16th inch gap is too much if not fully seated.
TIP FIVE: at 3:48 in the video it tells you that the new "direction" the number one cylinder/plug spark plug wire is pointing. This is important because of TIP ONE: which says just pop off the old and reuse it. I however swapped my spark plug wires being sure to note that the number one was in the same ont he new cap as the old. HOWEVER, when putting the new cap on the NUMBER 1 Spark Plug was in the same OLD location in order to move it I had to rotate each wire and make sure that the NUMBER ONE Spark Plug wire was now located in the new NUMBER ONE position as the rotor was pointing.
If you were to look at the rotor from the top the OLD Number 1 Spark Plug wire/rotor position would have been at about the 5 O'Clock position. If you put the new electronic distributor in, the new Number 1 Spark Plug wire/rotor position would be at about the 2 O'Clock position.
Maybe I did something wrong but I had to remove and rotate all the spark plug wires to correspond with the new rotor position.
Trust me I tried it with the cap just swapped and it didn't work. once I rotated the wires to the correct position it FIRED RIGHT UP.
I then timed it to about 28 degrees, and then hooked up the vacuum line.
Now onto the cosmetic stuff.....
I really only had one question prior to installing.
1. Do I just pop the old one out and install the new one?
ANSWER: Yes, but make sure you are set to TDC when you pull the old one out.
After watching the video is was pretty straight forward. BUT here are some things that they don't tell you .
TIP ONE: at 2:22 in the video he just pops off the distributor cap and lets it hang. Assuming that he plans to use the same old cap. I want to use my new one so if you do please take it off then swap your wires to your new cap. SEE tip FIVE because this is where the video shows that the cap rotated, BUT with my new one it was different.
TIP TWO: Use some grease/OIL/Moly to lube the small rubber gasket on the New Distributor shaft.
TIP THREE: Look inside the distributor HOLE and then line up the slot at the bottom with the two protruding notches on the bottom of the distributor. It makes an easier time sliding the Distributor in.
TIP FOUR: at 3:35 it talks about the Rotor being nice and tight. What I found is that in order to ensure the slots at the bottom have lined up correctly rotate the rotor until the little slots pop into place, you can feel it happen. ALSO when moving the rotor it is tight and only moves a little back and forth, IF it moves too much or is very loose and rotates a lot it is not all the way in and needs to be moved or rotated more to make it slide in further. EVEN a small 1/16th inch gap is too much if not fully seated.
TIP FIVE: at 3:48 in the video it tells you that the new "direction" the number one cylinder/plug spark plug wire is pointing. This is important because of TIP ONE: which says just pop off the old and reuse it. I however swapped my spark plug wires being sure to note that the number one was in the same ont he new cap as the old. HOWEVER, when putting the new cap on the NUMBER 1 Spark Plug was in the same OLD location in order to move it I had to rotate each wire and make sure that the NUMBER ONE Spark Plug wire was now located in the new NUMBER ONE position as the rotor was pointing.
If you were to look at the rotor from the top the OLD Number 1 Spark Plug wire/rotor position would have been at about the 5 O'Clock position. If you put the new electronic distributor in, the new Number 1 Spark Plug wire/rotor position would be at about the 2 O'Clock position.
Maybe I did something wrong but I had to remove and rotate all the spark plug wires to correspond with the new rotor position.
Trust me I tried it with the cap just swapped and it didn't work. once I rotated the wires to the correct position it FIRED RIGHT UP.
I then timed it to about 28 degrees, and then hooked up the vacuum line.
Now onto the cosmetic stuff.....

Comments
Post a Comment